Telecommuting is a pretty sweet gig with a good number of benefits. To name a few, while I’m working I can:
- Toss some laundry in the machine
- Start my lunch and work while it cooks
- Sign for packages when they are delivered
And that’s just the tip of the iceberg. However, to make telecommuting possible, there are some technologies I simply MST have working. VPN is a big one, so I can get at the computers back in the office. SSH and FTP access is important to manage servers and files. And of course, I need to communicate with people; for that, we use AIM and Skype. Up until recently, it’s been enough for me to use my Nokia N800 to make my calls back to the office. It’s no good for chatting with video though, so I needed to set it up on my desktop with my camera and, preferably, my headset.
Simple enough task really; both my Logitech webcam and Plantronics headset work out of the box with Ubuntu (at least in 9.04) with nearly zero configuration required. I just plug them in, tweak Skype quickly and I’m up and running. However, with the addition of PulseAudio in the more recent version of Ubuntu, this became a little trickier.
You see, in the new version of Skype, the ONLY option I have for ANY audio, input or output, is simpley PulseAudio. No control for which device to use for different tasks. Enter padevchooser, short for PulseAudio Device Chooser.
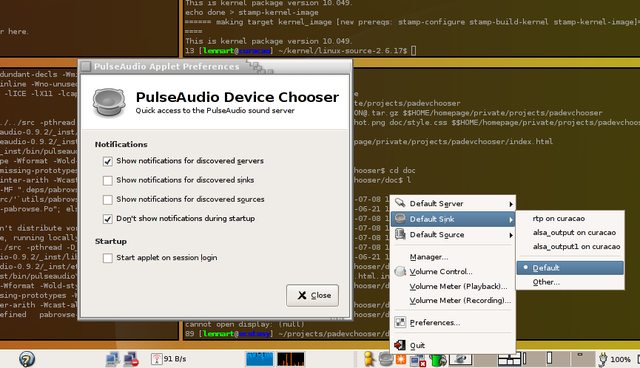
It’s a pretty sweet application, and you should have no problem installing it since it’s in the repository (note: I’ve added the Medibunutu repo, and it’s possible it came from there). Once installed, you simply run it, from the command line, the run dialog, gnome-do or whatever method you choose, and you’ll get an icon in the notification area. Click on that, choose Volume Control, and you’re off and running. There are tabs for Playback, Recording, Output Devices, and Input Devices. Any current audio stream will show up in the list in the appropriate tab and you can move them around to different devices.
The easiest way to configure Skype is to place a test call. As soon as you start that call it will show up in the list. Move the “Skype: Output” stream to your headset in the Playback tab, do the same for “Skype: Input” in the Recording tab and you’re off and running. All Skype audio is now sent to your headset for easy chatting. I still haven’t figured out how to make it ring through the speakers and still use the headset for chatting, but this is good enough for now. Padevchooser made living with PulseAudio that much better!